**Toilet Fill Valve Replacement: A Comprehensive Guide to a Leak-Free and Water-Efficient Toilet
**Toilet Fill Valve Replacement: A Comprehensive Guide to a Leak-Free and Water-Efficient Toilet
Replacing a toilet fill valve is a relatively simple DIY task that can save homeowners money on their water bills and reduce the risk of water damage. According to the U.S. Environmental Protection Agency (EPA), fixing leaks can save the average American household up to 10 gallons of water per day. In this article, we will walk you through the steps to replace a toilet fill valve, highlight the benefits of making this upgrade, and provide expert tips to ensure a smooth installation process.
The toilet fill valve is a crucial component of a toilet's flushing mechanism, responsible for refilling the tank after each flush. Over time, the valve can become clogged or worn out, leading to leaks, inefficiencies, and increased water consumption. Replacing the fill valve with a new one can address these issues and provide several benefits, including improved water efficiency, reduced water bills, and a quieter toilet operation.
**Benefits of Replacing the Toilet Fill Valve**
Replacing the toilet fill valve offers several advantages, including:
* **Improved Water Efficiency**: A new fill valve can help reduce water consumption by up to 20% compared to older models.
* **Reduced Water Bills**: Fixing leaks and inefficiencies can save homeowners money on their water bills.
* **Quieter Toilet Operation**: A new fill valve can help reduce noise and vibration during flushing.
* **Increased Durability**: Replacing the fill valve can extend the lifespan of the toilet and reduce the need for future repairs.
**Tools and Materials Needed**
To replace the toilet fill valve, you will need the following tools and materials:
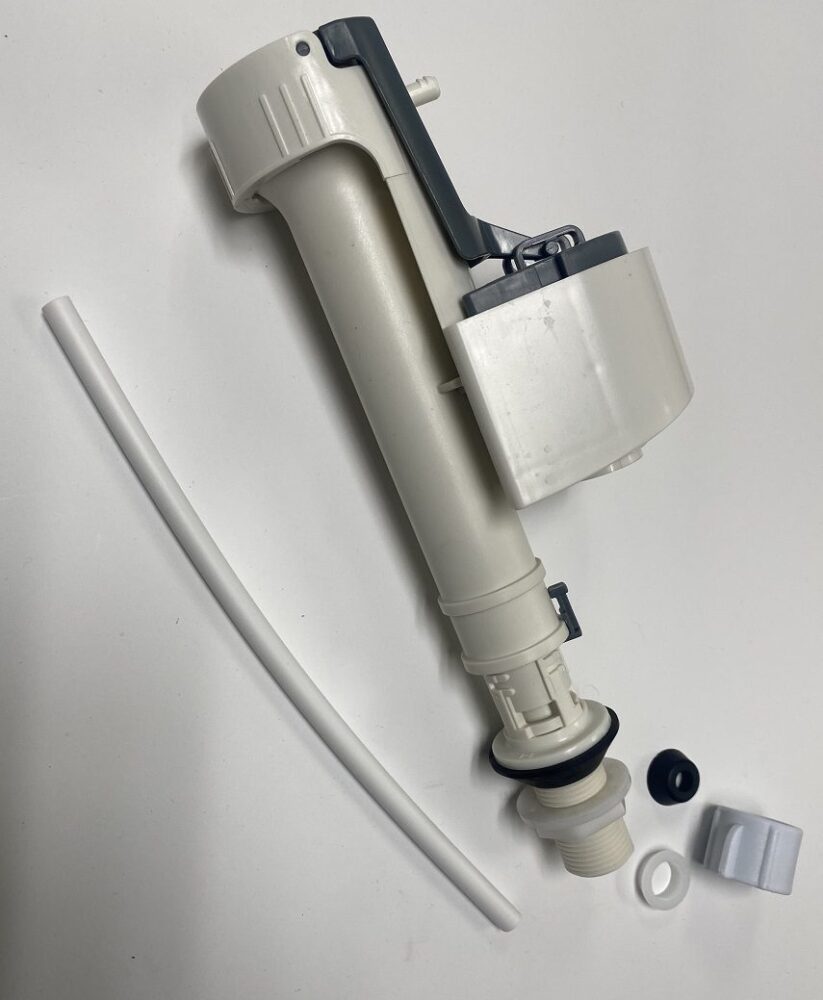
* **New Fill Valve**: Choose a fill valve that matches your toilet's specifications (e.g., low-flow or standard-flow).
* **Adjustable Wrench**: For loosening the old fill valve's retaining nut.
* **Channel-Type Pliers**: For gripping and twisting the old fill valve's connecting nut.
* **Needle-Nose Pliers**: For reaching and gripping small parts (e.g., O-rings).
* **Teflon Tape**: For sealing threaded connections.
* **Water Shut-Off Wrench**: For turning off the water supply to the toilet.
**Step-by-Step Replacement Guide**
Replacing the toilet fill valve is a relatively simple process that can be completed in a few hours. Follow these steps to ensure a successful installation:
1. **Turn off the water supply**: Locate the shut-off valve behind the toilet and turn it clockwise to shut off the water supply.
2. **Disconnect the water supply line**: Use an adjustable wrench to loosen the retaining nut and remove the water supply line from the old fill valve.
3. **Disconnect the fill valve from the tank**: Use channel-type pliers to grip the connecting nut and twist it counterclockwise to release the fill valve from the tank.
4. **Remove the old fill valve**: Carefully lift the old fill valve out of the tank and set it aside.
5. **Inspect and clean the tank**: Inspect the tank for any mineral buildup or debris and clean it thoroughly before installing the new fill valve.
6. **Install the new fill valve**: Follow the manufacturer's instructions to install the new fill valve, ensuring that all connections are secure and tightened properly.
7. **Reconnect the water supply line**: Use Teflon tape to seal the threaded connections and tighten the retaining nut to secure the water supply line.
8. **Turn on the water supply**: Turn the shut-off valve counterclockwise to restore water supply to the toilet.
9. **Test the toilet**: Flush the toilet several times to test the new fill valve's performance and ensure that there are no leaks.
**Tips and Considerations**
When replacing the toilet fill valve, keep the following tips and considerations in mind:
* **Choose the right fill valve**: Select a fill valve that matches your toilet's specifications and meets your water-saving goals.
* **Follow manufacturer's instructions**: Read and follow the manufacturer's instructions for installing the new fill valve.
* **Use Teflon tape**: Apply Teflon tape to threaded connections to ensure a secure and leak-free seal.
* **Test the toilet**: Flush the toilet several times to test the new fill valve's performance and ensure that there are no leaks.
Replacing the toilet fill valve is a relatively simple DIY task that can save homeowners money on their water bills and reduce the risk of water damage. By following these steps and tips, you can ensure a successful installation and enjoy the benefits of a leak-free and water-efficient toilet.

:max_bytes(150000):strip_icc()/fluidmaster-fill-valve-repair-2719029-hero-513e35ed3fe248ccbf91b126e5a4910e.jpg)
:max_bytes(150000):strip_icc()/adjusting-types-of-toilet-ballcocks-1824861-09-91d82c57bfd042aaa67346e60634f872.jpg)
Related Post
How To Replace Toilet Fill Valve: A Step-by-Step Guide to Saving Water and Money

What Time Is The Game Tonight: A Guide to Staying Informed about Sports Schedules

Jennysospecial Nude

Unlocking Seamless Healthcare: The Power of Mychart Wexner Medical Center